Braided Ponytail Hairstyles: 12 Ways to Braid a Ponytail
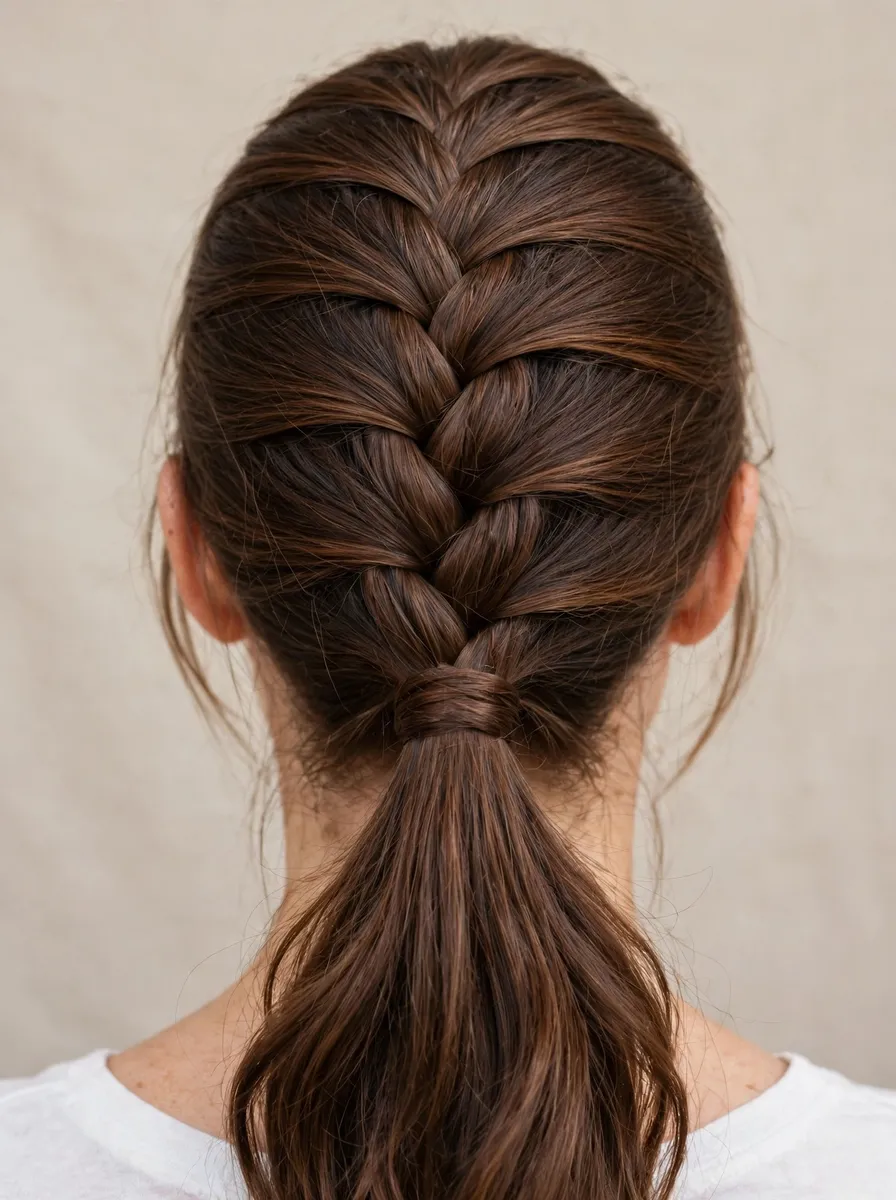
A braided ponytail is any ponytail with a plait worked into it somewhere: woven down the scalp before the tail starts, braided through the tail itself, or wrapped around the base as a detail. That one addition changes everything a plain ponytail cannot do — it holds layers in place, keeps the style intact through a workout or a windy day, and reads as deliberate rather than default. The twelve versions below run from a five-minute classic to a salon-built feed-in style, and each one notes how hard it is and how much length it actually needs.
Most of these build on two foundation skills. If your French braid is rusty, our French braid tutorial walks through the hand positions slowly. And one technique is deliberately missing from the list: the two-strand rope, which has its own dedicated rope braid ponytail tutorial — treat that as the thirteenth option once you have worked through these.
1. Classic French Braid Ponytail
The starting point: a single French braid woven from the crown down to the nape, then gathered into a ponytail instead of being braided to the ends. Braid as normal, feeding in hair from both sides, and when you reach the nape, stop adding sections, gather everything and secure with an elastic. The tail hangs loose below the braid, which gives you the pattern without the stiffness of a full braid. Difficulty: easy to moderate — if you can French braid, this is faster than finishing one. Length: shoulder length or longer, so the braid has room to form before the tail begins.
2. Dutch Braid Ponytail
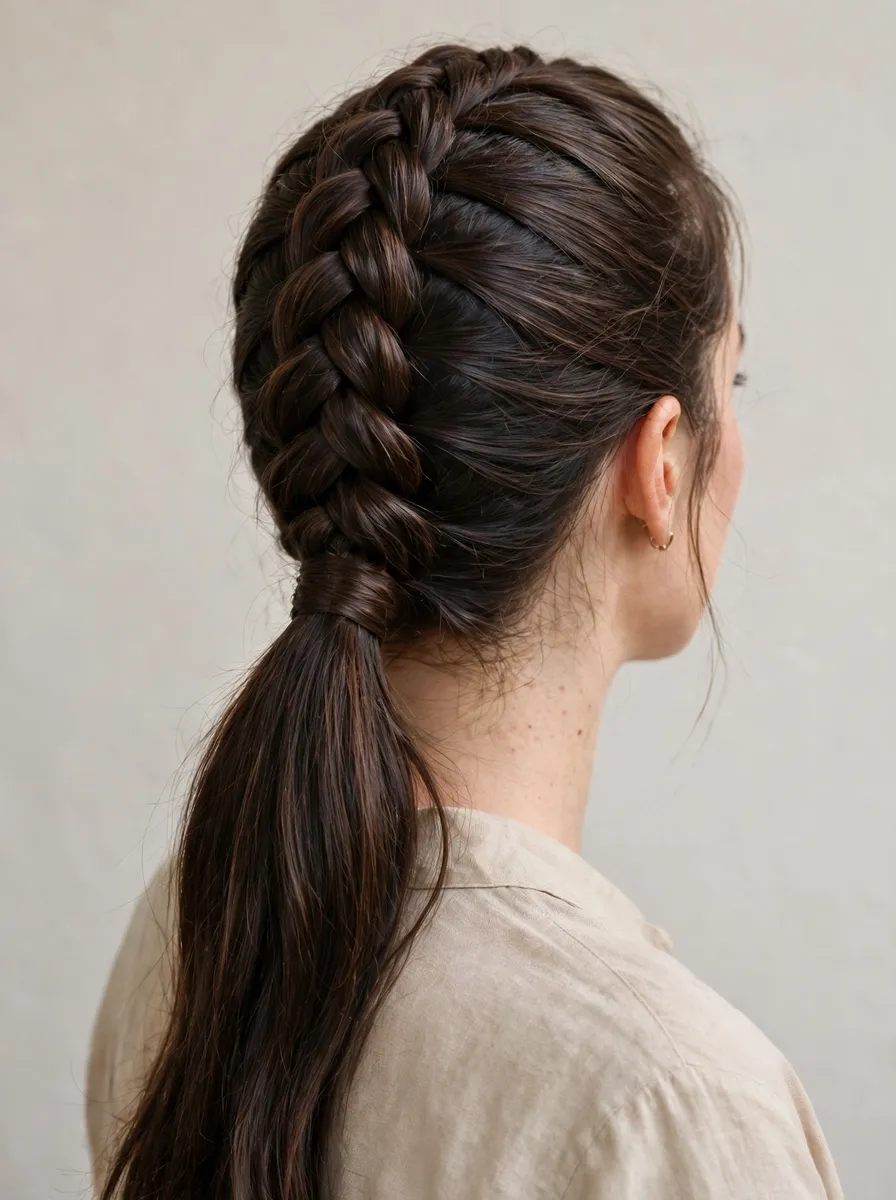
The same construction as the classic, but the braid sits on top of the hair instead of sinking into it. Cross each side section under the middle rather than over, and the braid pops up in a raised ridge that photographs far more boldly than its French counterpart. Keep the crossings snug and the tension even, because a raised braid shows every loose stitch. Finish at the nape with an elastic, or carry the Dutch braid higher and tie off at the crown for a sportier tail. Difficulty: moderate — the under-crossing feels backwards until it clicks. Length: shoulder length or longer.
3. Fishtail Ponytail
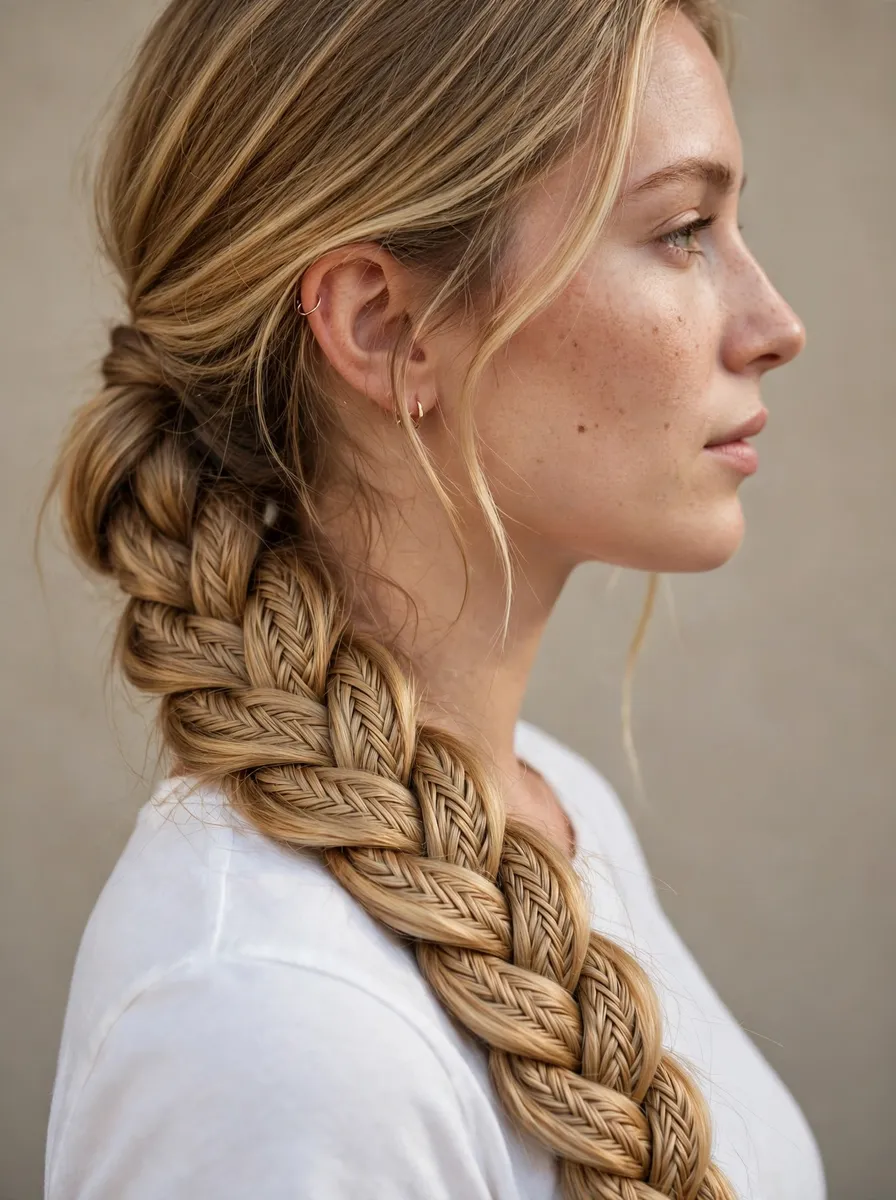
Here the scalp stays smooth and the ponytail itself does the work. Tie a ponytail at whatever height you like, split it in two, and fishtail the whole length: small pieces crossed from the outside of each half into the other, over and over, until the herringbone pattern runs to the ends. It is slow but simple, and the fine pattern looks far more intricate than the effort involved. Gently pull the edges apart afterwards to fatten the braid. Difficulty: easy, just time-consuming. Length: armpit length or longer — fishtails eat length quickly.
4. Side Braid Ponytail
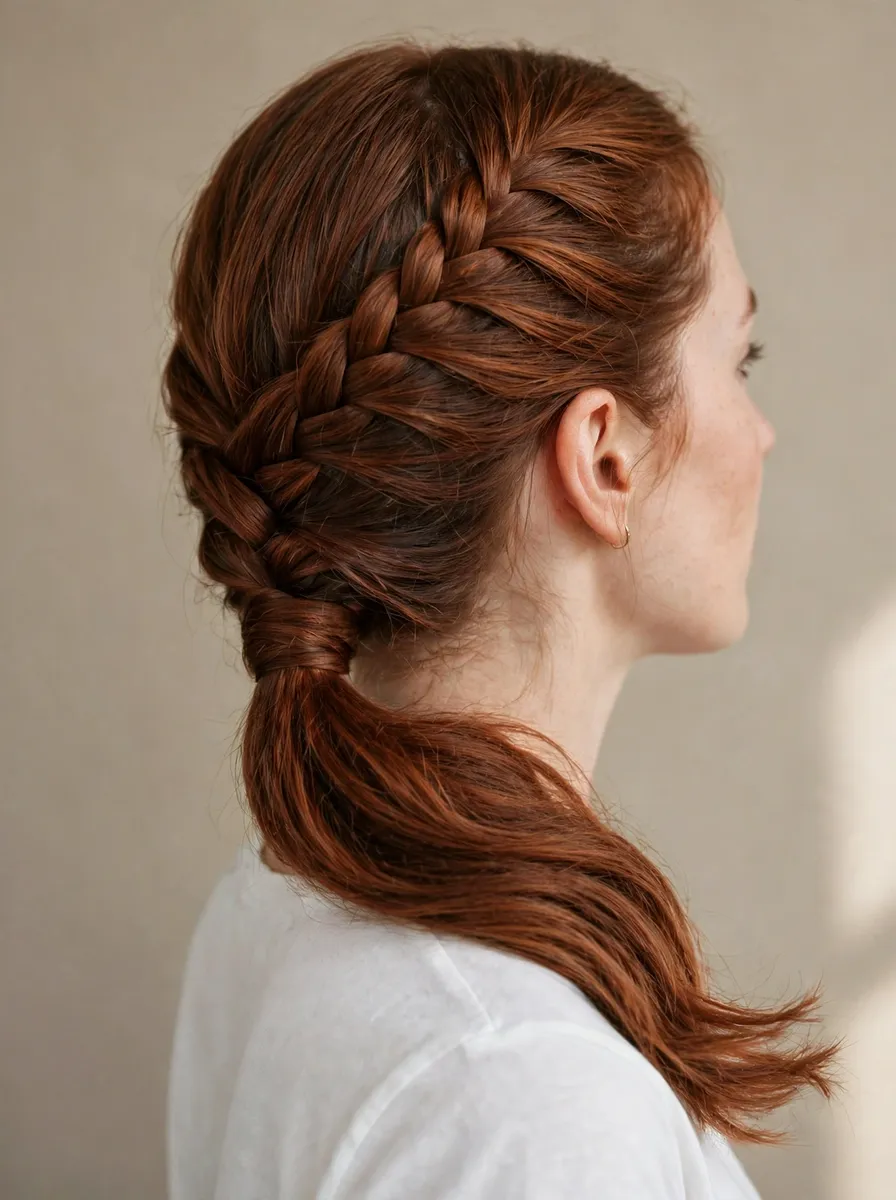
Start the braid at one temple or above one ear and work it diagonally across the back of the head, French or Dutch style, feeding in hair as you travel. When you reach the opposite nape corner, gather the rest of the hair and tie everything into a low ponytail that rests over one shoulder. The diagonal line is the whole appeal, so keep your sections angled rather than letting the braid drift straight down. Difficulty: moderate — braiding at an angle across your own head takes one practice run. Length: shoulder length or longer, with longer hair showing the sweep best.
5. High Braided Ponytail
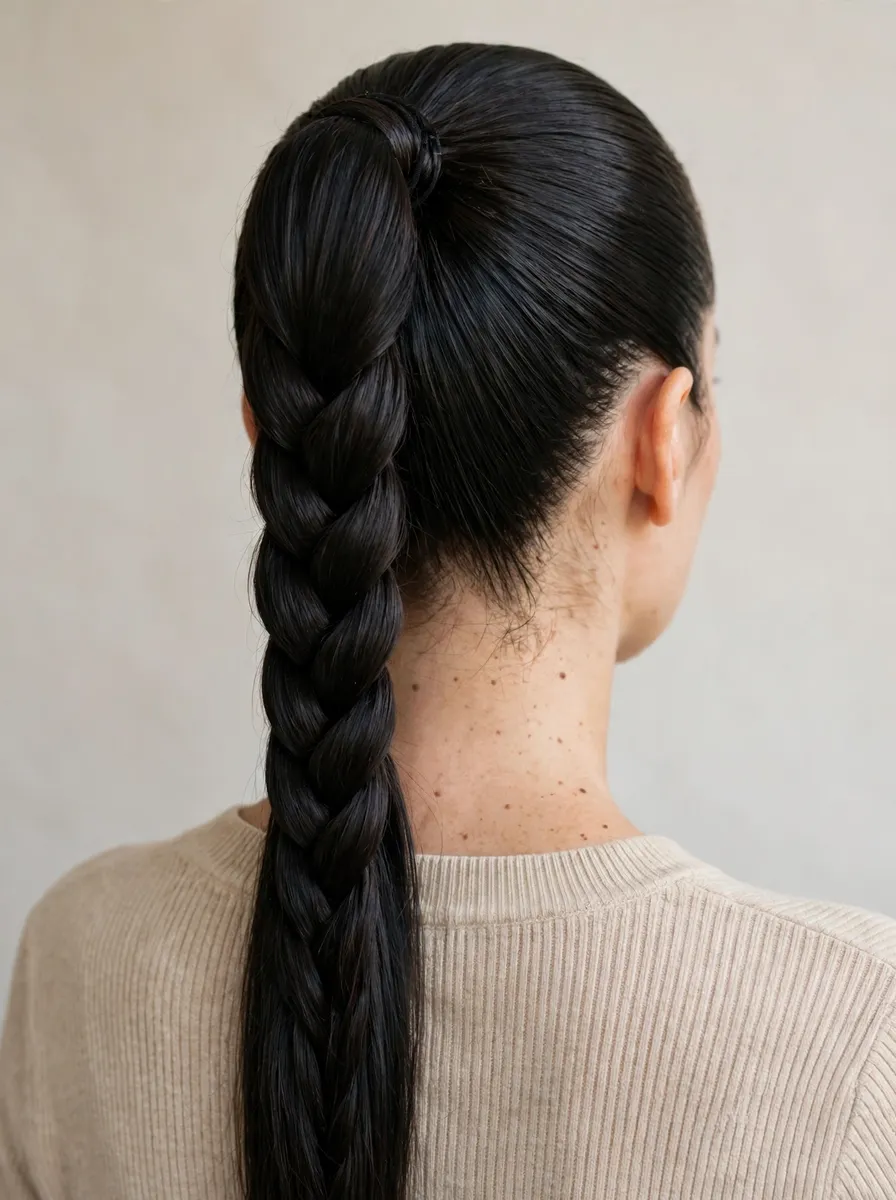
The dramatic one: hair brushed completely smooth and tied high on the crown, then the ponytail braided in a plain three-strand plait all the way down. The height does the styling — the braid swings as you move and the sleek base keeps it polished. Brush the roots smooth with a little gel or wax before tying, because bumps at the base cannot be fixed afterwards, and braid the tail firmly so it hangs straight rather than curling. Difficulty: easy — the braiding is basic; the sleek base is the skill. Length: long, ideally bra-strap length or beyond, since braiding shortens the tail considerably.
6. Low Braided Ponytail
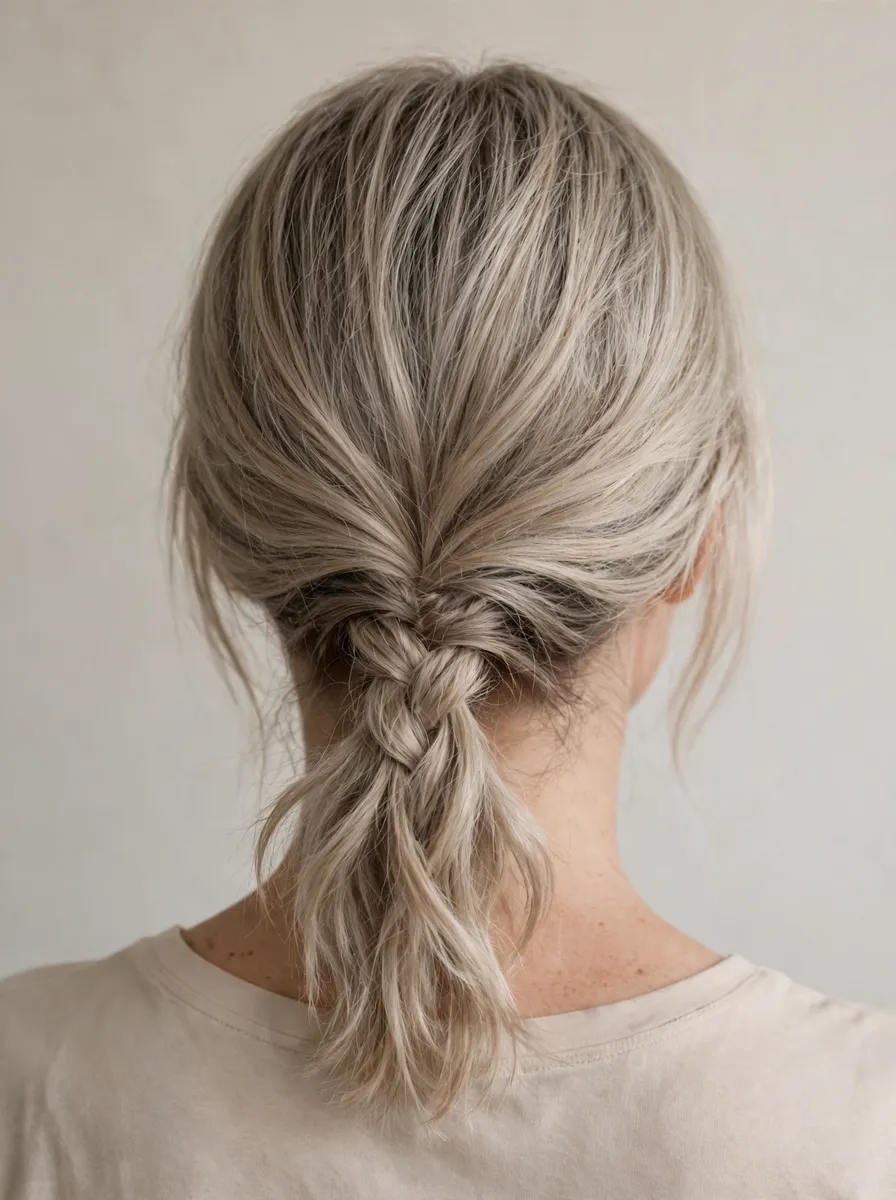
The quiet version: a ponytail tied at the nape, braided loosely in a simple three-strand plait and finished with a small elastic. Nothing is woven into the scalp, nothing is pulled tight, and the result reads as polished rather than styled — the one on this list that works for a formal office or an evening event. A centre or deep side parting both suit it, and a strand of hair wrapped around the base elastic lifts it further. Difficulty: the easiest here. Length: chin length can manage a short version; shoulder length and beyond looks best.
7. Bubble Braid Ponytail
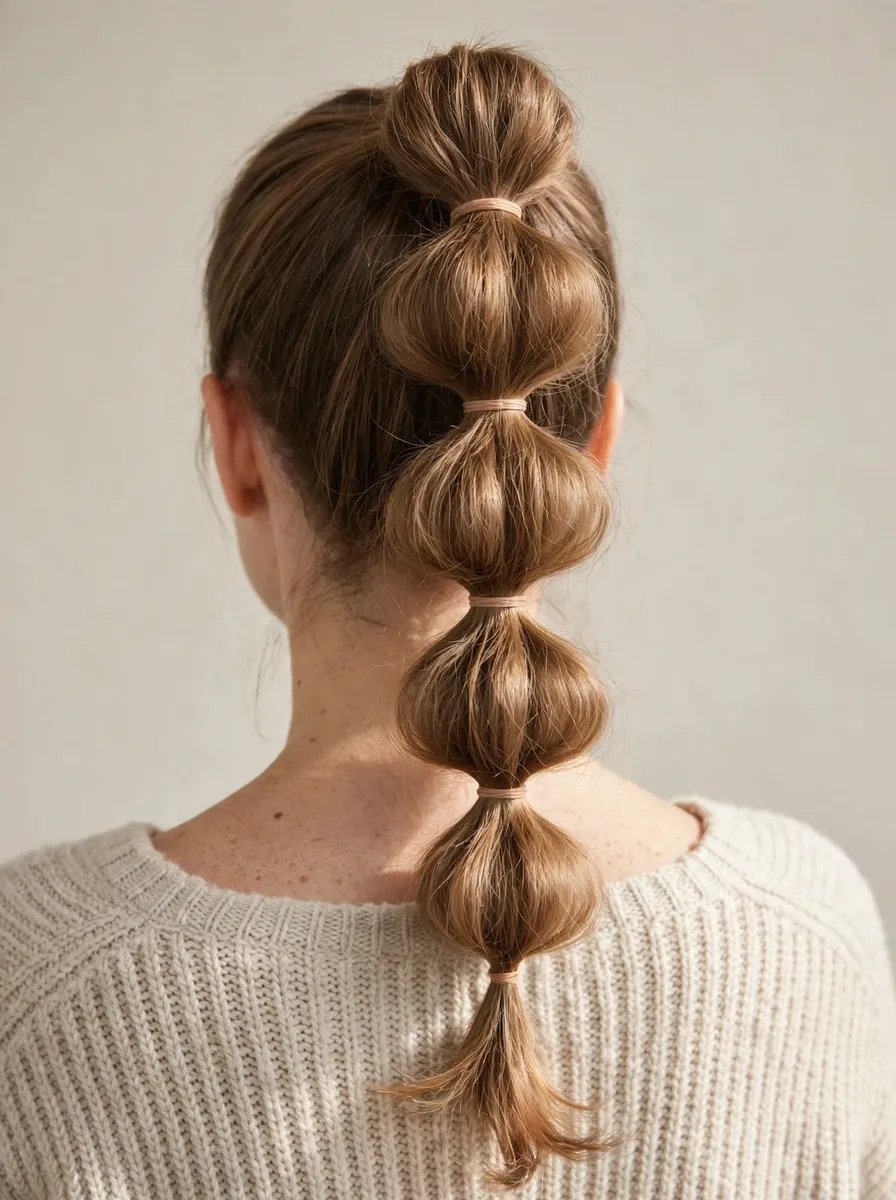
The cheat’s braid: no weaving at all. Tie a ponytail, then add small elastics every few centimetres down its length and puff each section out into a rounded bubble. It mimics the rhythm of a braid while asking nothing of your braiding skills, and it is the fastest way to make fine or shorter hair look fuller than it is. Our full bubble braids guide covers spacing, elastic colours and the double version. Difficulty: the easiest of all twelve. Length: shoulder length or longer, so you can fit at least three bubbles.
8. Double Braids into One Ponytail
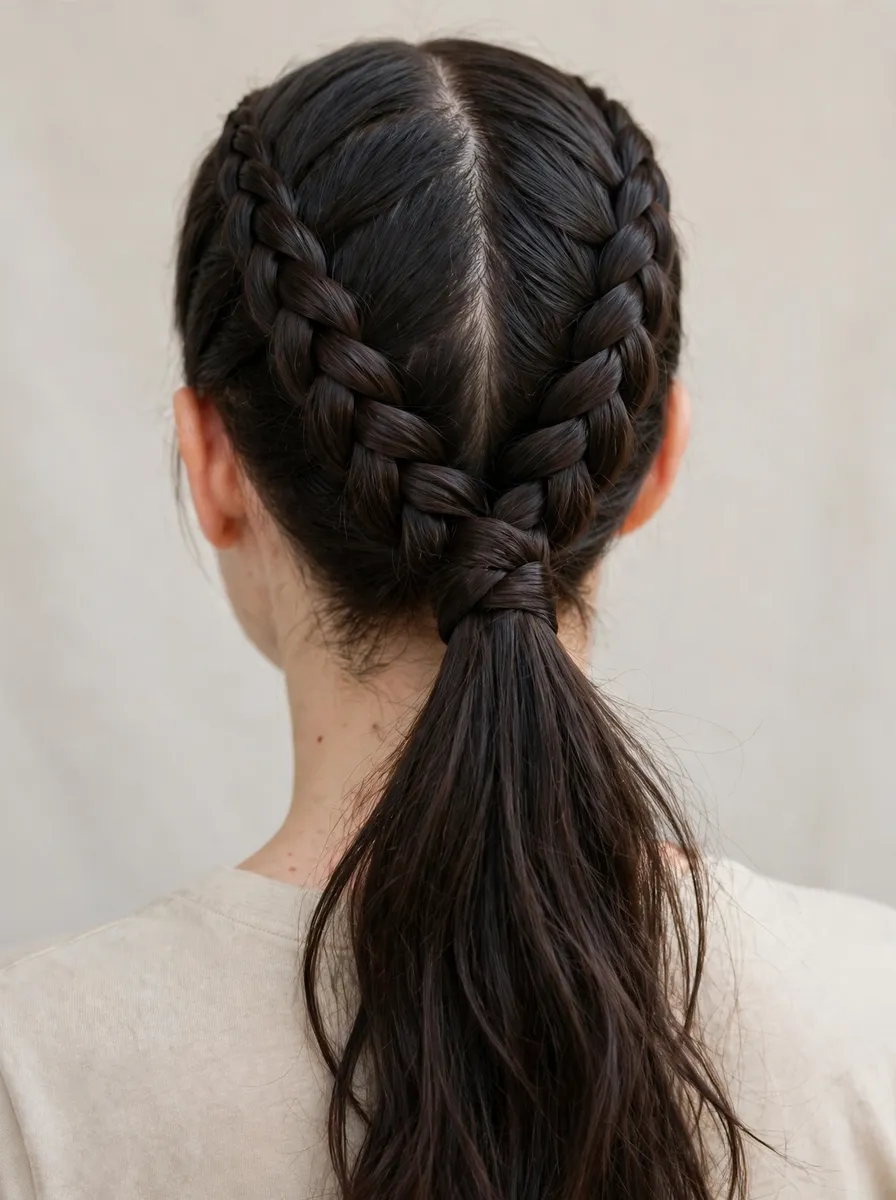
Part the hair down the centre and French braid each side from the hairline back, the way you would start double braids — but instead of braiding each side to its own end, stop both braids where they meet at the back of the head and tie everything together into one ponytail. You get the grip and symmetry of double braids with a single swinging tail, and the style holds exceptionally well because the hair is anchored twice over. Difficulty: moderate to hard — two neat braids plus a tidy merge point. Length: shoulder length or longer.
9. Crown Braid Ponytail
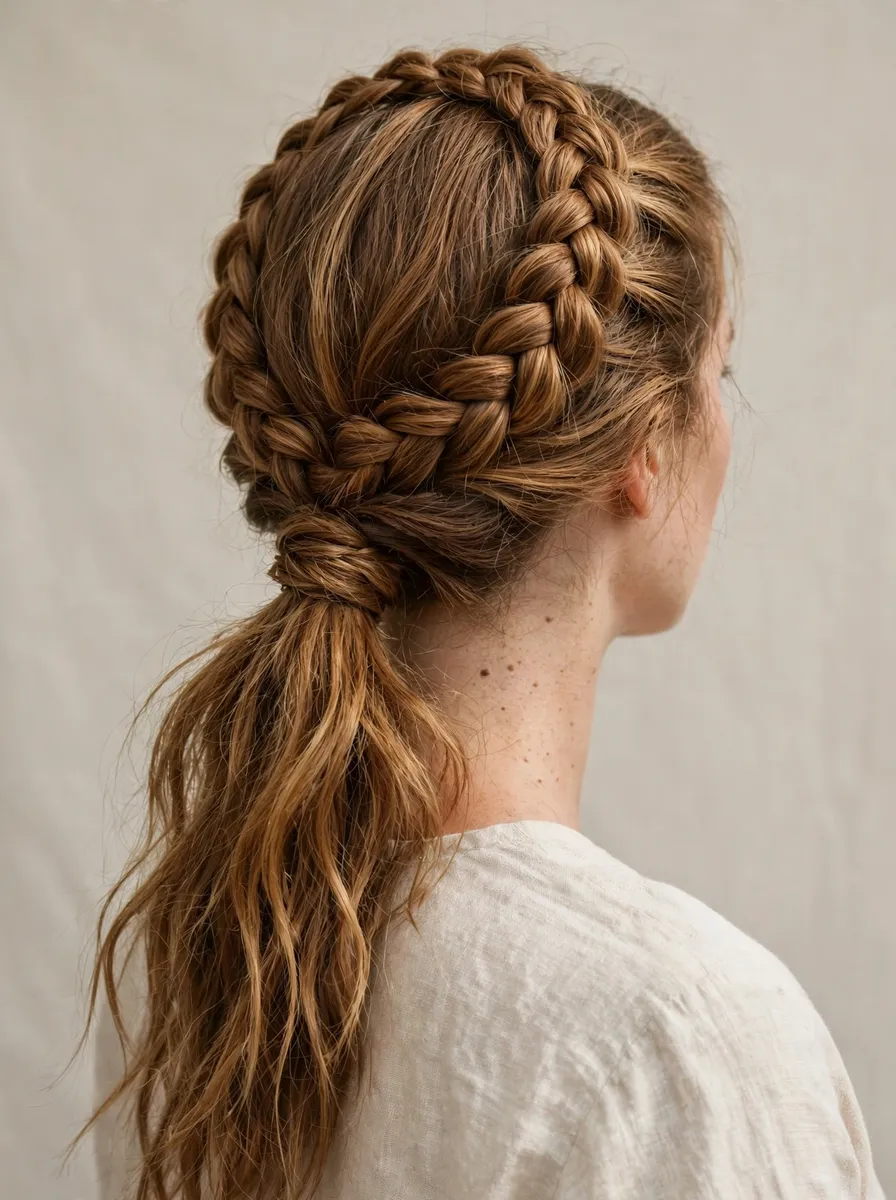
A braid that travels around the head like a headband — starting behind one ear, across the front hairline or around the back — and then collects into a low ponytail rather than pinning into a full crown. Work a Dutch braid for definition, feeding in hair from the hairline side as you travel, and when you complete the circuit, gather the remaining hair and tie it off at the nape. It keeps every strand off the face while leaving the tail free. Difficulty: hard — braiding around your own head is the most demanding direction here. Length: armpit length or longer.
10. Braided Ponytail with a Wrap
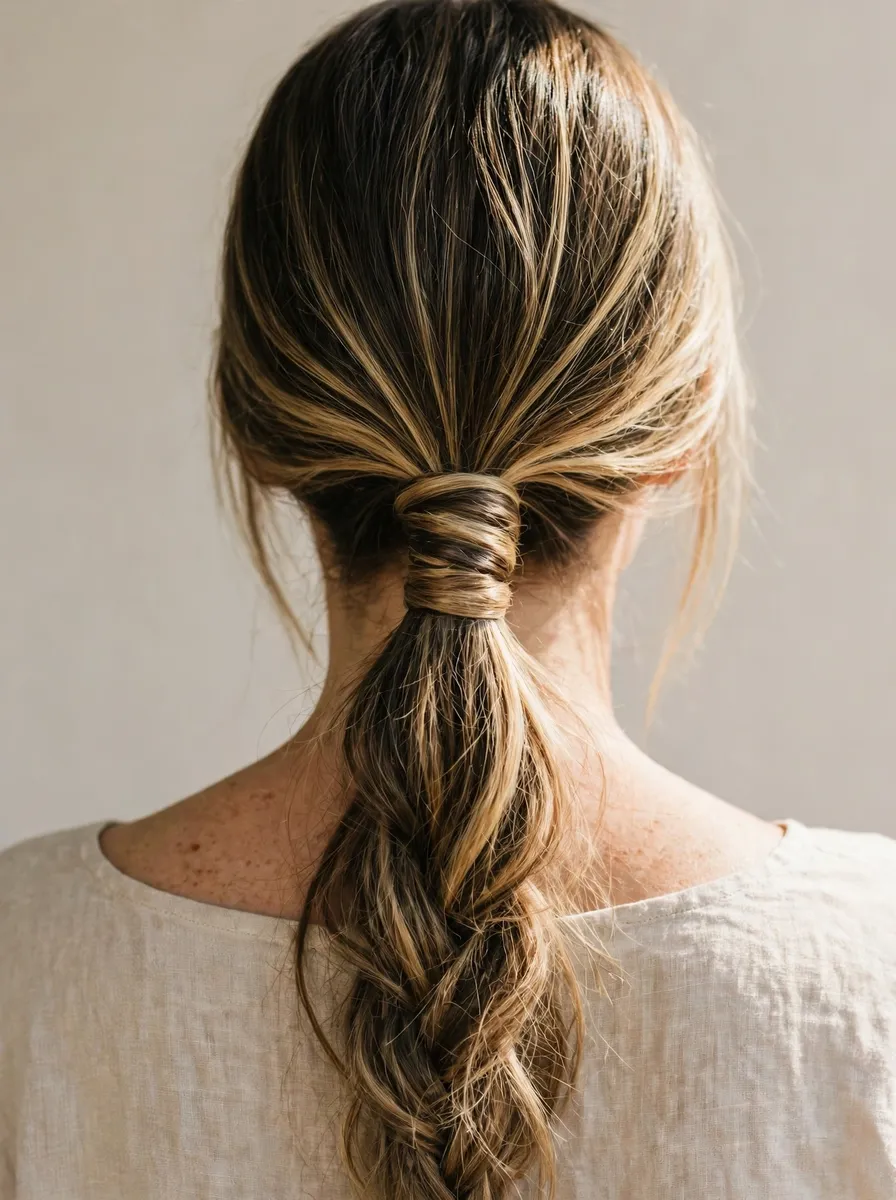
A detail, not a technique: take any ponytail on this list, braid it, then hide the base elastic by wrapping a thin strand of hair around it and pinning the end underneath. The wrap takes thirty seconds and moves the whole style up a register — it is the difference between a gym ponytail and an event ponytail. Take the strand from underneath the tail so the join stays invisible, wrap it three or four times, and pin vertically into the elastic. Ribbon or a thin scarf works in place of the hair strand. Difficulty: easy, as an add-on to any style here. Length: whatever the base style needs, plus a few centimetres for the wrap strand.
11. Feed-In Ponytail
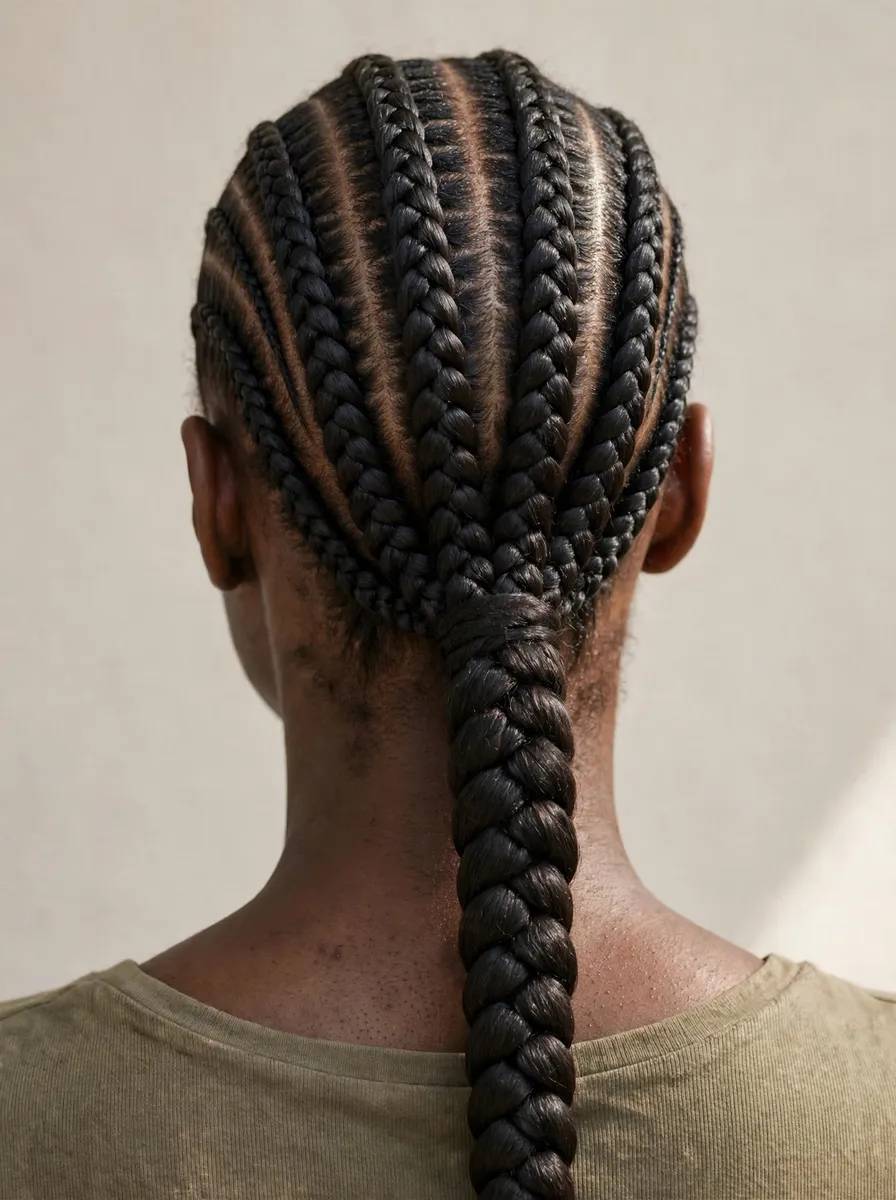
The long-wear option: hair braided back in neat feed-in cornrows — braiding hair added gradually so the rows start fine at the hairline and build without a bulky knot — and gathered into a single long braided ponytail. Done well, it lasts two to four weeks with the scalp oiled and the style slept in a scarf or bonnet, which makes it a genuine protective style rather than a one-day look. This is the one version on the list most people book a braider for; the partings and tension need a practised hand. Difficulty: advanced, usually salon-built. Length: any — the length comes from the added braiding hair.
12. Messy Textured Braided Ponytail
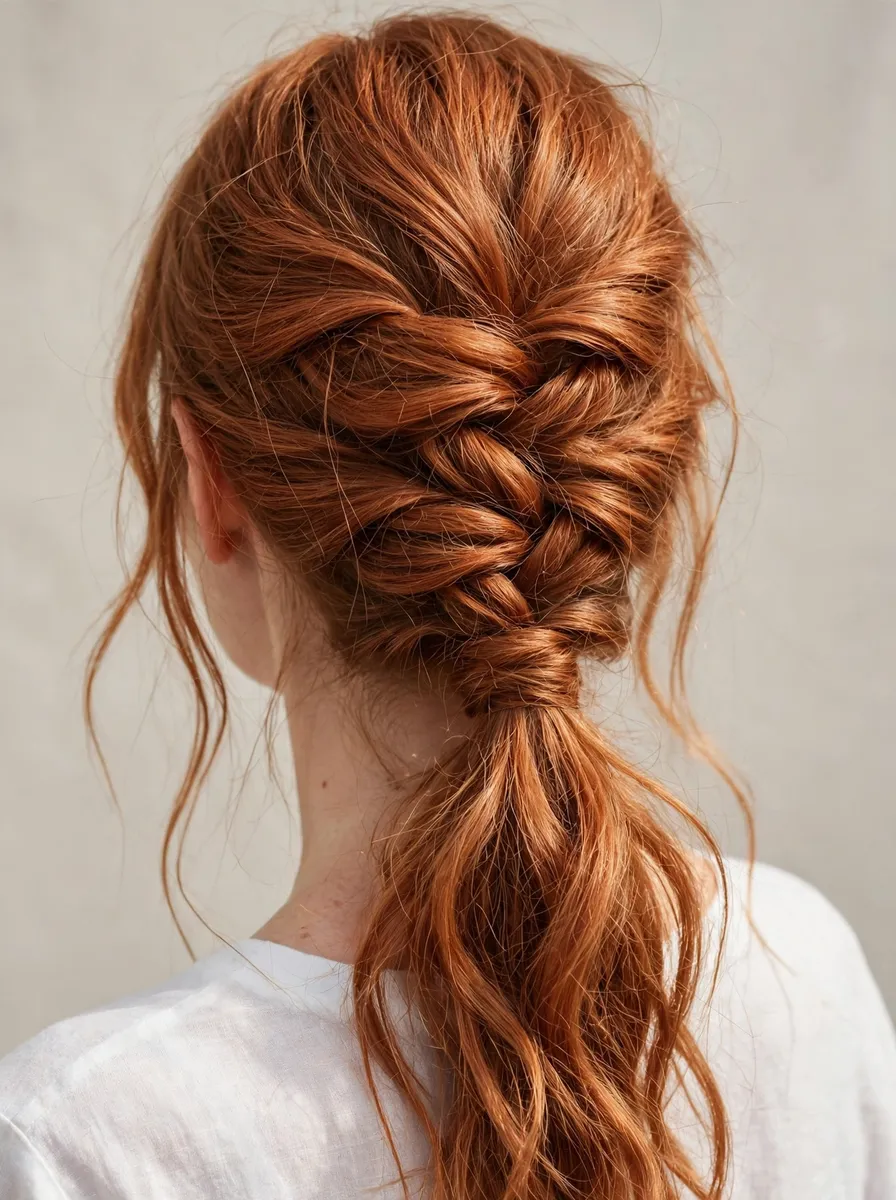
The undone version of everything above: braid any ponytail loosely, then pull each loop of the braid gently outward — pancaking — until the pattern looks fat, soft and slightly dishevelled, and let a few strands escape at the front. Texture is the point, so start with waved or second-day hair rather than freshly smoothed lengths, and do not chase symmetry. It forgives imperfect braiding completely, which makes it the best first attempt for beginners, and it pairs naturally with half-up half-down styles on days when a full ponytail feels like too much. Difficulty: easy. Length: shoulder length or longer; layers actually help the texture.
Tips for a Braided Ponytail That Lasts
Build grip before you braid. Freshly washed hair is slippery, and every style here holds longer on second-day hair, or with dry shampoo or texture spray worked through first. Braids grip themselves, but only if the hair has something to grip with.
Match the elastic to the job. Small clear silicone elastics for braid ends — they hold without bulk and disappear against the hair. A proper fabric-covered tie at the ponytail base, where the weight sits. Never a rubber band: it saws through hair at exactly the point the braid bends.
Anchor the base first. On any style where a braid meets a ponytail, the join takes all the strain. Tie the ponytail elastic firmly before you start braiding the tail, and if the base still slips, cross two bobby pins over the elastic in an X.
Braid slightly tighter than you want it. Every braid relaxes in the first hour. Braid snug, then pancake or loosen deliberately once it is secured — you can always soften a braid, but you cannot tighten one that has already gone slack.
Frequently Asked Questions
How long does hair need to be for a braided ponytail?
Shoulder length covers most styles on this list. The low braided ponytail and the bubble version work a little shorter, from a long bob, while the fishtail, high braided and crown versions need armpit length or more, because braiding consumes length as it goes. The feed-in ponytail is the exception — its length comes from added braiding hair, so your own hair only needs to be long enough to cornrow.
Which braided ponytail is easiest for a beginner?
The low braided ponytail: tie, plait, done. The bubble braid ponytail is equally easy and needs no braiding at all, just elastics. Start there, and move to the classic French braid ponytail once your hands know the pattern — every other style on the list is a variation on those foundations.
How do I stop a braided ponytail from slipping out?
Grip and anchors. Work texture spray or dry shampoo through the hair before you start, use silicone elastics on braid ends, and make sure the ponytail base elastic is firm before any braiding begins. If layers escape from the scalp braids, they were probably cut too short to reach — smooth a little styling cream over them and pin the worst offenders flat.
Can you do a braided ponytail on short hair?
A short version, yes. Chin-to-shoulder hair can manage the low braided ponytail, a half-up braided ponytail where only the top section is braided and tied, or the bubble version with two or three bubbles. The scalp-woven styles need more length to form their pattern, so save those until the hair reaches the shoulders.
Is a braided ponytail suitable for sport and workouts?
It is one of the best options. The double braids into one ponytail and the Dutch braid ponytail hold through running and training because the hair is anchored along the scalp as well as at the base. Keep the base elastic firm, choose the high or mid position so the tail does not rest on your neck, and the style should outlast the session.
How long does a feed-in braided ponytail last?
Typically two to four weeks, depending on how fast your hair grows and how well it is kept. Sleep in a silk or satin scarf or bonnet, oil the scalp lightly every few days, and avoid heavy product build-up at the roots. Take it down when the rows start to lift or feel loose — leaving a protective style in too long causes the matting it was meant to prevent.
Final Thoughts
Twelve styles, but really only three skills: a French or Dutch braid along the scalp, a plait through a tied tail, and the small finishes — a wrapped base, a puffed bubble, a loosened loop — that change the register. Learn the classic first, then vary the placement: higher, lower, sideways, doubled. The ponytail you already wear most days is one braid away from looking like you meant it.