Bubble Braids: 11 Ways to Wear the Playful Puffed Braid
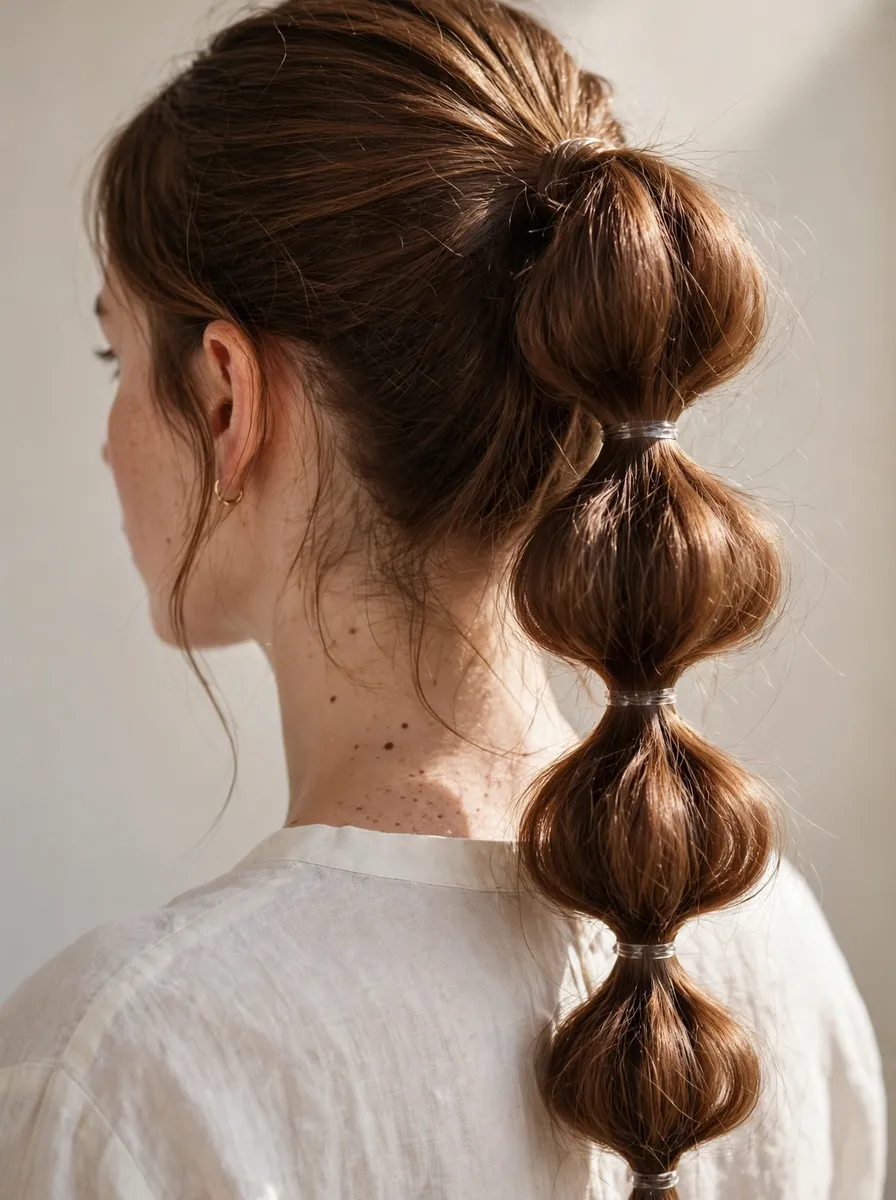
A bubble braid is not really a braid at all. It is a ponytail — or two, or a half-up section — divided into segments with small elastics, and each segment gently pulled outward until it puffs into a rounded bubble. No strands are crossed, nothing is woven, and there is no pattern to lose halfway down. If you can tie a ponytail and space out a handful of hair elastics, you can make every style in this article, which is exactly why the look keeps resurfacing every festival season and refuses to leave.
Because the technique never changes, all the variety comes from placement: high or low, single or double, polished or undone. It is also kind to fine, slippery hair, because the elastics do the holding a woven braid asks friction to do. Our types of braids guide maps the whole family — the bubble braid is the one member that skips the braiding entirely.
1. Classic Bubble Ponytail
The reference version: hair gathered into a mid-height ponytail, then elastics added every five to seven centimetres down the tail, each segment teased outward into a soft, even bubble. Keep the bubbles roughly the same size — that regularity is what makes it look deliberate rather than improvised. It works on any hair long enough to hold four or five bubbles, and it is the best starting point because the spacing and puffing technique you learn here transfers unchanged to every other style on this page. Wear it sleek at the crown for polish, or loosen the top for a softer daytime feel.
2. Double Bubble Braids
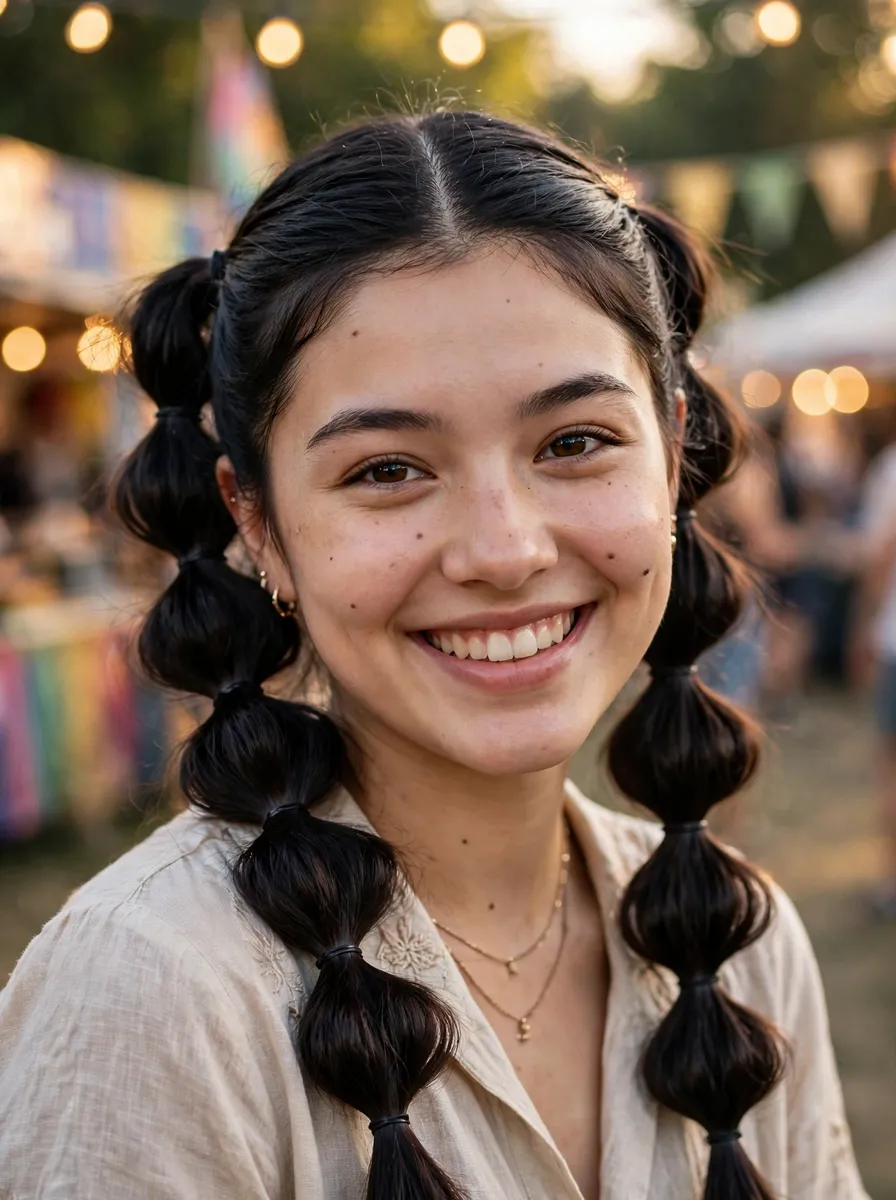
Two bubble braids worn as pigtails, parted cleanly down the middle. Doubling the style halves the hair in each tail, so the bubbles come out smaller and neater — use tighter spacing, around four centimetres, and puff gently so the segments stay plump rather than wide. It is the most playful version here and a festival and holiday favourite, but it is not only for teenagers: worn low, with a centre part and minimal makeup, it reads as a deliberate retro reference. Match the bubble positions on both sides as you go; asymmetry is very visible in a doubled style.
3. Half-Up Bubble Braid
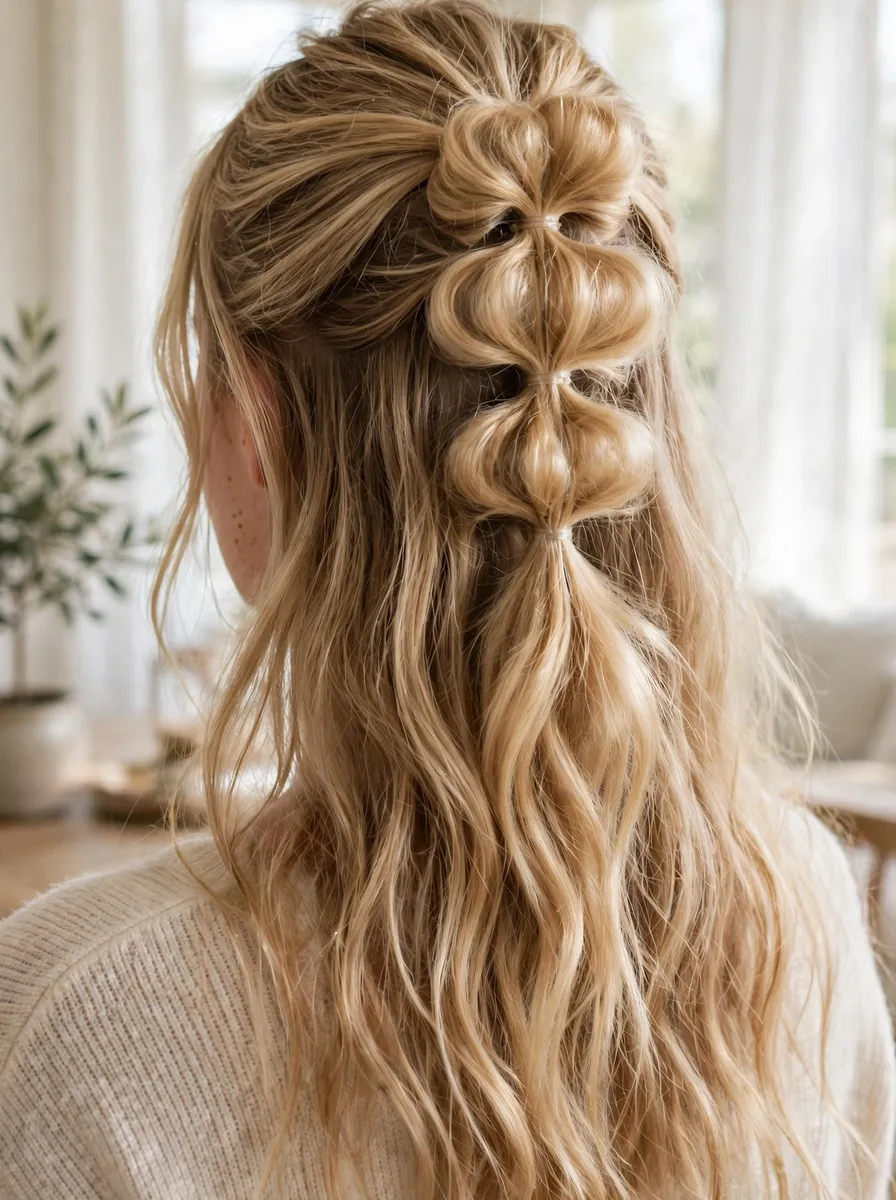
The top section of the hair — roughly everything above the ears — gathered into a small ponytail at the crown and bubbled down its length, with the rest worn loose. This is the version for anyone whose hair is too short or too fine for a full bubble ponytail: the gathered section is smaller, so three or four plump bubbles are easy to achieve, and the loose hair underneath supplies the length and movement. It suits second-day hair especially well, because the section that gets oily first is the section that ends up bubbled.
4. Low Bubble Ponytail
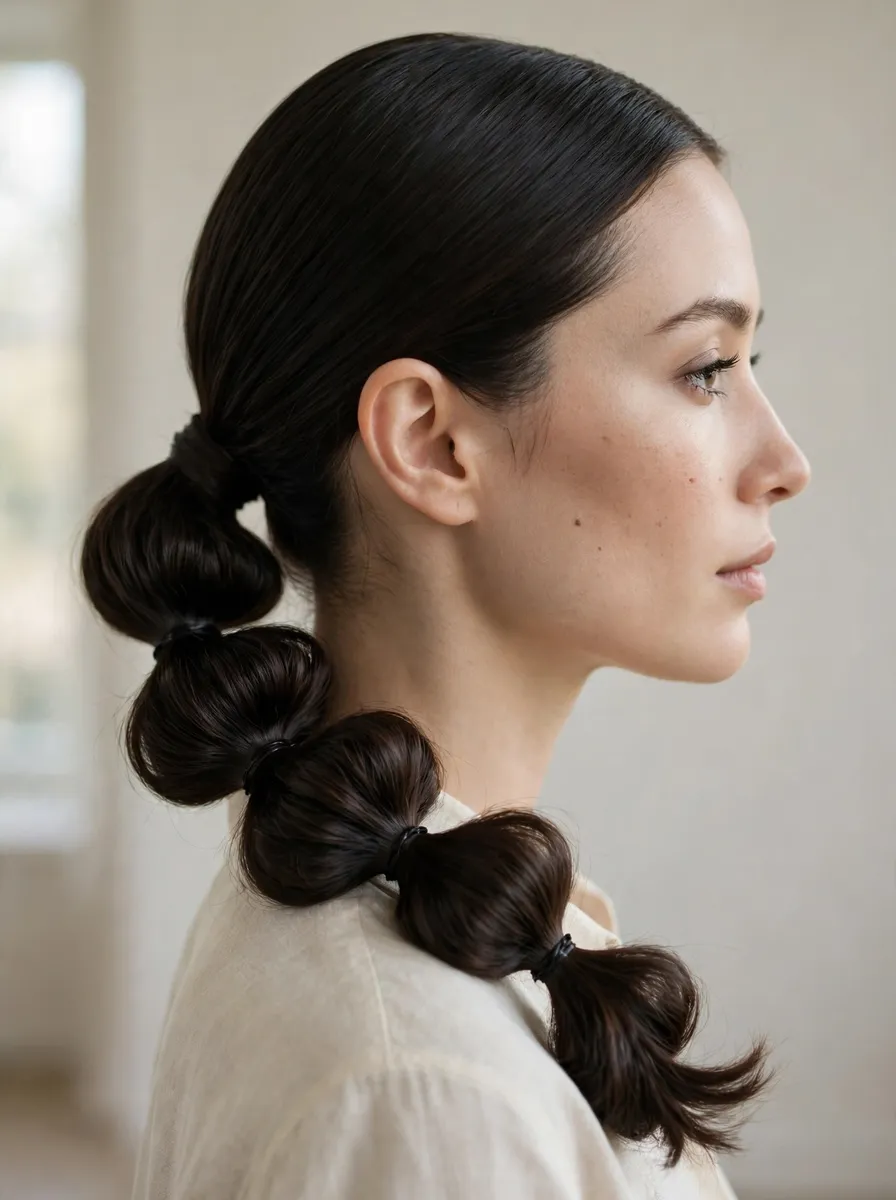
The same construction dropped to the nape: hair smoothed back and secured low, bubbles running down a tail that rests over one shoulder. Moving the base down changes the register completely — where the classic version is sporty, this one is calm and grown-up, and it pairs well with tailoring, high necklines and statement earrings. Because a low ponytail has less tension holding it, seat the first elastic firmly and consider a spritz of hairspray over the crown before you start puffing. It is the easiest bubble style to wear to work without comment.
5. Side Bubble Braid
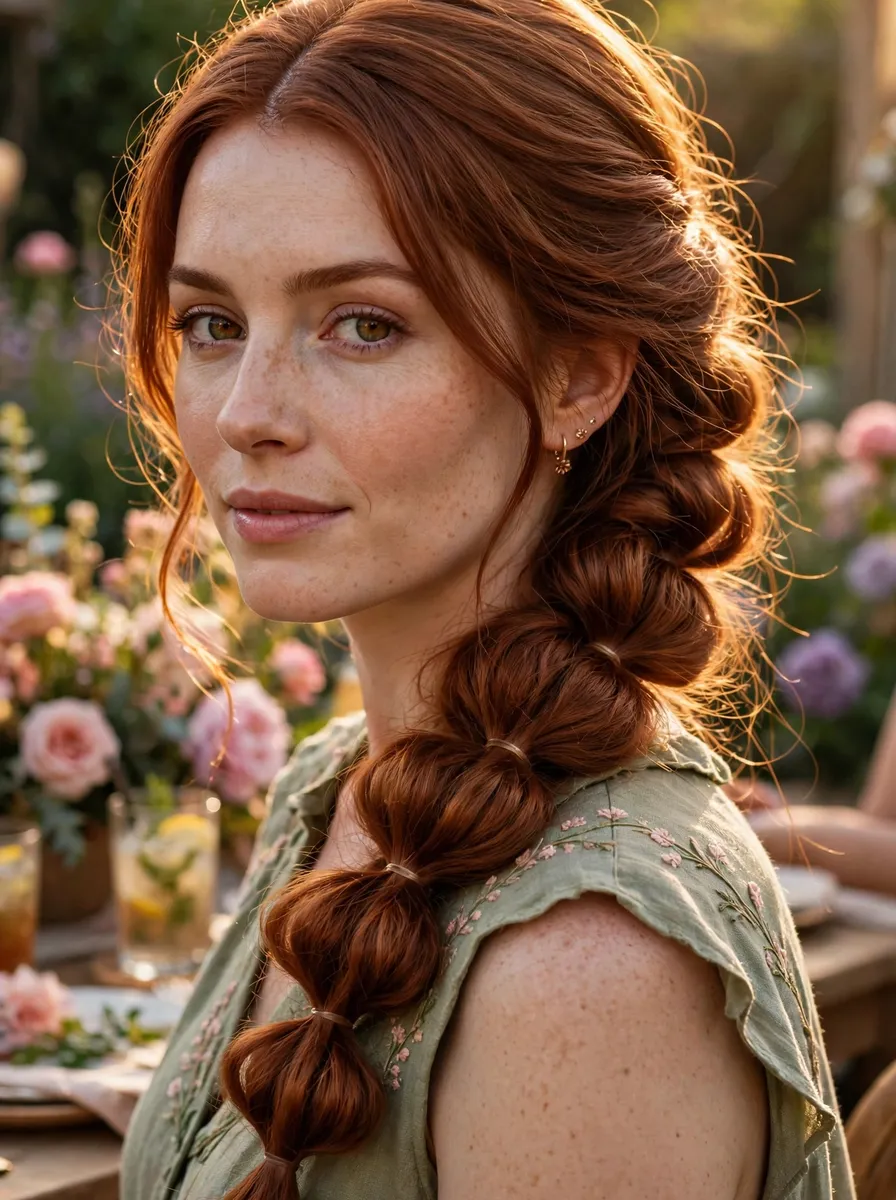
All the hair swept to one side and bubbled down over the shoulder. Start with a deep side part, gather everything at the opposite side of the nape, and build the bubbles so the tail lies flat against the shoulder rather than springing forward. The asymmetry does the styling work, which makes this a strong choice for events and photographs — it shows in profile and over one shoulder in a way a centred ponytail never does. It needs length: the sweep across the back uses up several centimetres before the first bubble even starts.
6. Bubble Braids for Short Hair

Short hair cannot hold a long run of bubbles, so the short version changes the format instead of fighting it: two small bubble braids along the front hairline, a single mini bubble ponytail at the crown, or a short tail with just two or three tight bubbles. Work with smaller elastics and closer spacing — around three centimetres — and puff each segment only slightly, because short sections spring out of elastics if they are over-expanded. On a bob, a pair of front bubble braids keeps the hair off the face and makes the cut look styled rather than simply short.
7. Bubble French Braid
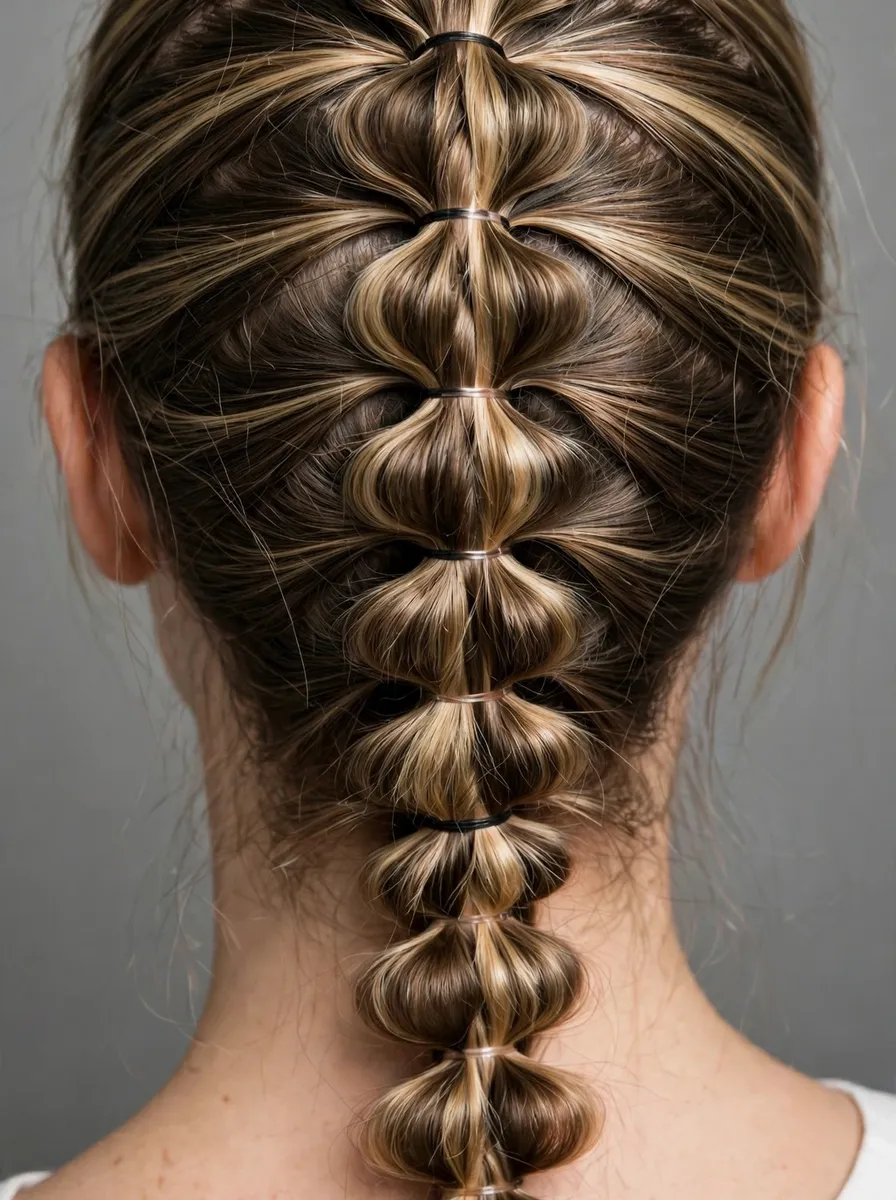
The one style here that borrows a braiding idea: instead of starting from a finished ponytail, you begin with a small section at the front hairline, tie it off, then add the next section of loose hair into each new elastic as you work down the head. The result sits flat against the scalp like a French braid, with bubbles instead of a woven ridge. It is the most secure bubble style — nothing swings or slides — which makes it the choice for sport, dancing and long days. It takes a little practice to keep the joins even, but there is still nothing to weave.
8. Bubble Braid with Ribbons
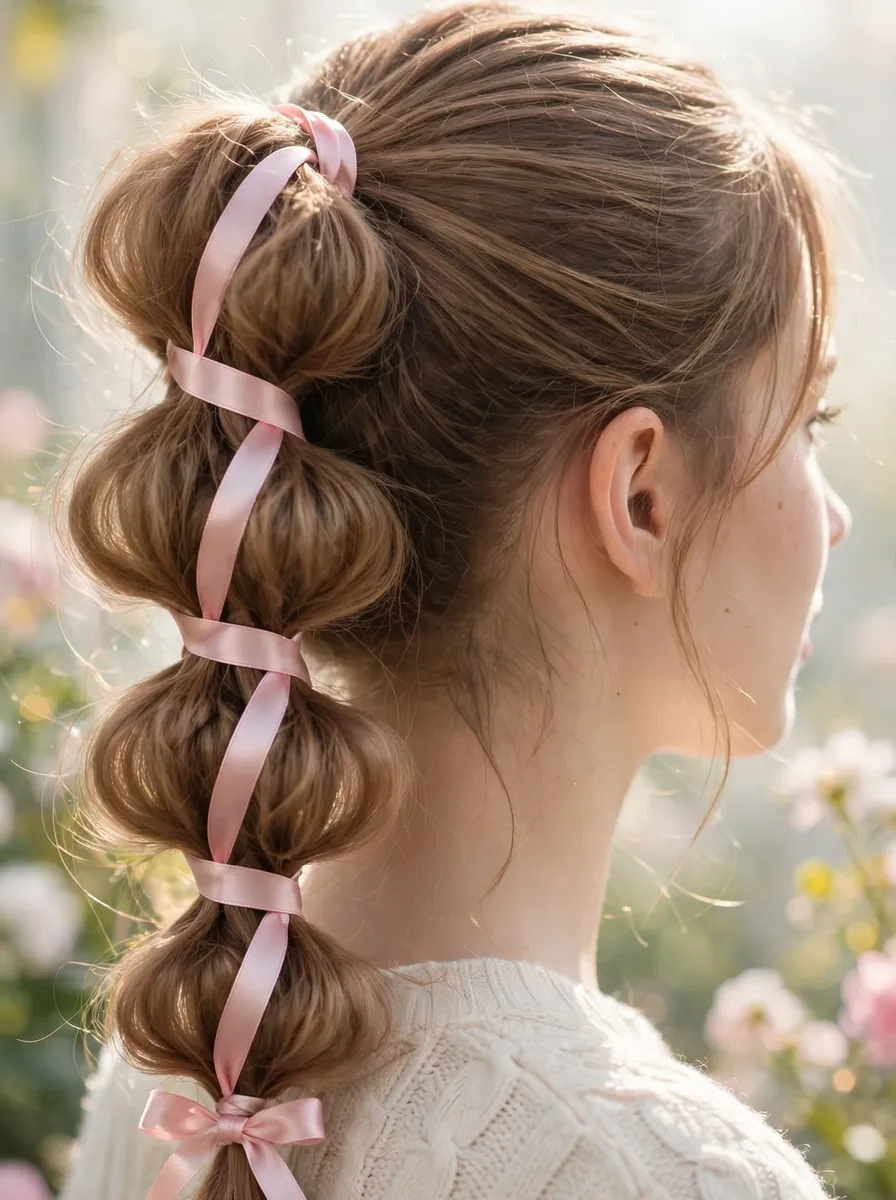
A classic bubble ponytail with a ribbon threaded through it: knot the ribbon at the base, then wrap or weave it around each elastic as you add them, letting it show between the bubbles. The ribbon does two jobs — it hides the elastics, and it sets the mood, from gingham and playful to black velvet and genuinely elegant. Use a ribbon at least twice the length of the tail, because wrapping eats length quickly, and choose one with some body; flimsy ribbon disappears between the bubbles instead of framing them. A bow tied at the final elastic finishes it cleanly.
9. Mini Bubble Braids (Face-Framing)

Two slim sections at the front hairline, each bubbled with tiny elastics into a chain of miniature puffs, with everything else worn loose. It is the lowest-commitment way to wear the trend — ten minutes, no gathering, nothing pulled back — and it changes how loose hair photographs more than its size suggests, because the eye goes straight to the framed face. Keep the bubbles small and close together, around two to three centimetres apart, and stop at chin or jaw level rather than running them the full length of the section.
10. Bubble Braid Bun
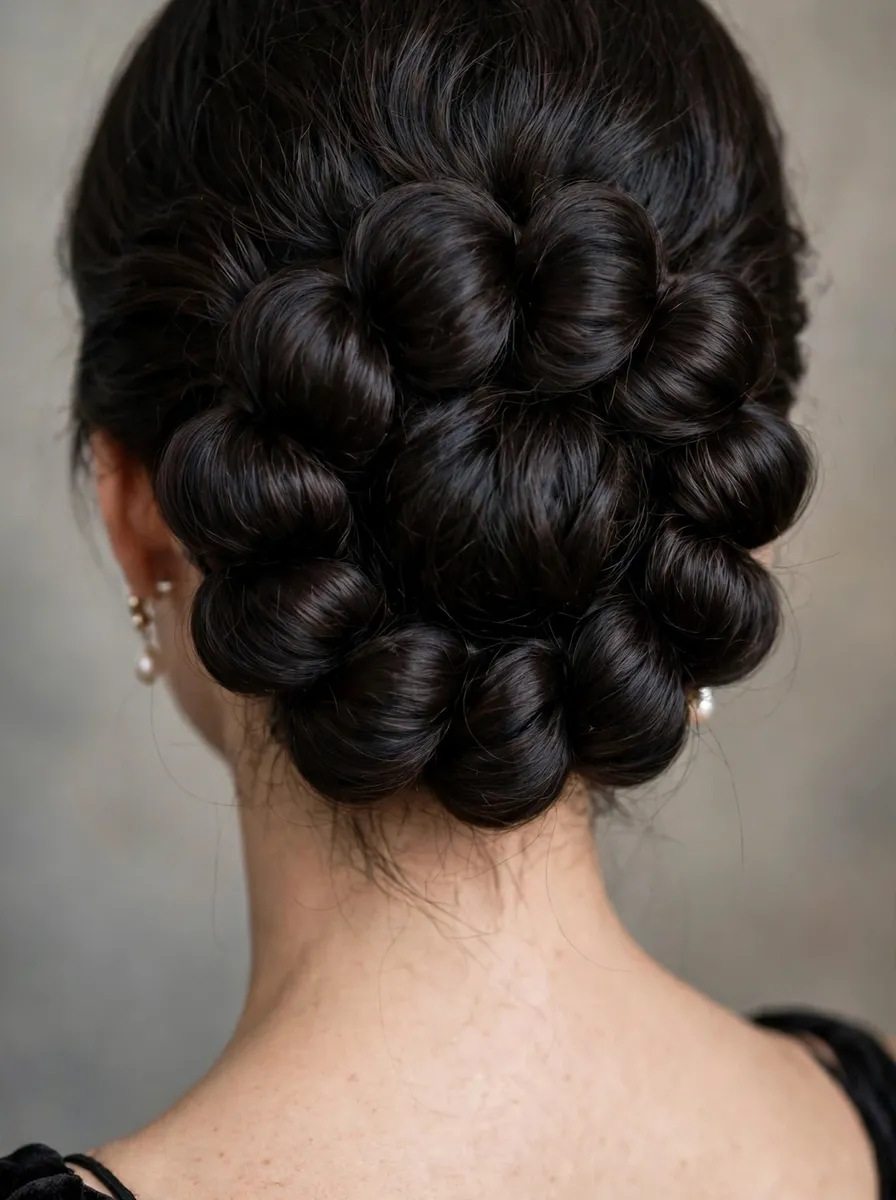
Build a bubble ponytail first, then wrap the bubbled tail around its own base and pin it into a bun, arranging the bubbles so they show as a ring of rounded segments. The puffed sections give the bun a texture no ordinary twisted bun has, and the elastics inside do most of the holding, so it needs fewer pins than you would expect. It is the most formal version here — a genuine updo — and it suits weddings and evening events where the playful ponytail versions would feel too casual. Practise the wrap once before the day; the bubbles need guiding, not forcing, into place.
11. Bubble Braids with Loose Waves

The undone version: a low or side bubble braid with the bubbles pulled wider and flatter than usual, face-framing pieces left out, and the unbraided hair worn in loose waves. Where the classic style is neat geometry, this one is deliberately irregular — vary the bubble sizes slightly and roughen each segment with your fingers after puffing. It sits naturally alongside boho braids, sharing the same relaxed, festival-adjacent register, and it is the most forgiving version for beginners because unevenness reads as intention rather than error.
How to Do a Bubble Braid
The method is the same for nearly every style above. If you are new to styling your own hair at all, our beginner braid guide covers the sectioning and hand positions that make this easier.
- Start with a smooth ponytail. Brush the hair into the position you want — high, low, side or half-up — and secure it firmly with a strong elastic. This base elastic carries the whole style.
- Add the second elastic five to seven centimetres below the first (closer for short or doubled styles).
- Puff the section. Gently pull the edges of the hair between the two elastics outward on all sides until it rounds into a bubble. Small, even tugs work better than one big pull.
- Repeat down the tail, adding an elastic, then puffing, keeping the spacing consistent. Always puff as you go — going back to expand earlier bubbles disturbs the ones below.
- Finish by teasing out any pieces you left loose and misting lightly with hairspray if you need all-day hold.
Tips for grip on fine hair: work on hair that is not freshly washed, or add dry shampoo or texture spray first — clean, silky hair slides straight out of elastics. Use small, fabric-covered elastics and double-wrap the base. If a bubble keeps collapsing, your sections are too long; closer spacing holds far better.
Frequently Asked Questions
Is a bubble braid a real braid?
No. Nothing is woven or crossed — a bubble braid is a ponytail divided into segments with small elastics, with each segment pulled outward into a puff. That is precisely its appeal: it gives the visual rhythm of a braid with none of the technique.
How many elastics do you need for a bubble braid?
For a classic ponytail on shoulder-length or longer hair, around five to eight, spaced five to seven centimetres apart. Shorter and doubled styles use closer spacing — three to four centimetres — so they need proportionally more.
Do bubble braids damage your hair?
Less than most elastic styles, provided you use snag-free elastics and never rip them out. Slide or snip them out rather than pulling them down the hair shaft, and avoid maximum tightness — the puffing, not the tension, creates the shape.
Can you do bubble braids on short hair?
Yes, with adjusted expectations: two or three tight bubbles on a short tail, front hairline bubble braids, or a mini crown version all work on bob length. The spacing shrinks to around three centimetres, and each bubble is puffed gently so short sections do not spring free.
How long do bubble braids last?
A single styling lasts the day comfortably, and the French-style version (style 7), anchored at each step, can hold for two days. Ponytail versions are best taken out at night — sleeping on elastics creases the hair and stresses the same points.
What is the difference between a bubble braid and a pull-through braid?
They look similar and both are faux braids, but a pull-through braid loops each section through the one above it, making a woven-looking chain, while a bubble braid simply segments a ponytail with elastics and puffs each segment. The bubble version is faster and easier to undo.
Final Thoughts
The bubble braid earns its popularity honestly: it is the rare statement hairstyle with no skill barrier. Learn the spacing and puffing once on the classic ponytail, and the other ten styles are just placement decisions — lower it for work, double it for play, anchor it French-style for sport, wrap it into a bun for the evening. Start with the version that matches the next occasion in your calendar, and keep a packet of small elastics in your bag; this is a five-minute fix as much as it is a planned style.